Introduction
The basics of integrating with our REST API
Overview
In this guide we will go over all of the things you need to get setup to start using the API straight away, as well as listing the various functionalities of the API.
Authentication
As mentioned earlier in the documentation you will need both a sandbox and/or Blink account, and you will need the associated set of API credentials. These will be used to generate an access token with the tokens endpoint which you will then use to access the other API endpoints using Bearer authentication. The full documentation is listed in our API reference.
Tokens endpoint
How to authenticate with the Blink API to get your access token
API Reference
All of the endpoints are documented in our API reference
To use Direct Debit you must connect a GoCardless account to your Blink account within the Customer Centre -> Manage Direct Debits section of the Blink dashboard.
Taking payments
When using the API you can take payments with card, open banking or Direct Debit. Each of the payment flows start with creating a payment intent. Which is an object which contains all of the attributes associated with the payment your customer is about to make. It contains
- Transaction type
- Payment type
- Card
- Direct Debit
- Open banking
- Amount of payment
- Currency code
- The redirect url which your customer returns to
- The notification url to receive updates on your server
- Other meta data such as customer name, email, and any other custom attributes
Create intent
Creating a payment intent when your customer initates your payment flow.
British pound sterling (GBP) is the only accepted currency for Direct Debit and open banking payments.
Processing payments
Once you've created your payment intent the next step is to create a form for your customer or agent to enter the customer details. Our create intent api will return you a HTML form which you can embed or alternatively you can construct the form from the rest of the payment intent response. The form will need to include all of the required parameters of the relevant payment processing endpoint to the method of choice.
Only when processing card payments you will also need to use our HostedFields.js library to securely take and tokenize the customers card details via an iframe more details is in the payment page article on how to integrate this.
After you're user has submitted Process the form you will need to hit the relevant payment processing endpoint for your selected payment method. This will either finish processing the payment or return a url or form so you user can complete 3D secure or open banking respectively.
You can use any of the test credentials for testing open banking or card details. Open banking details just use any real account in test mode.
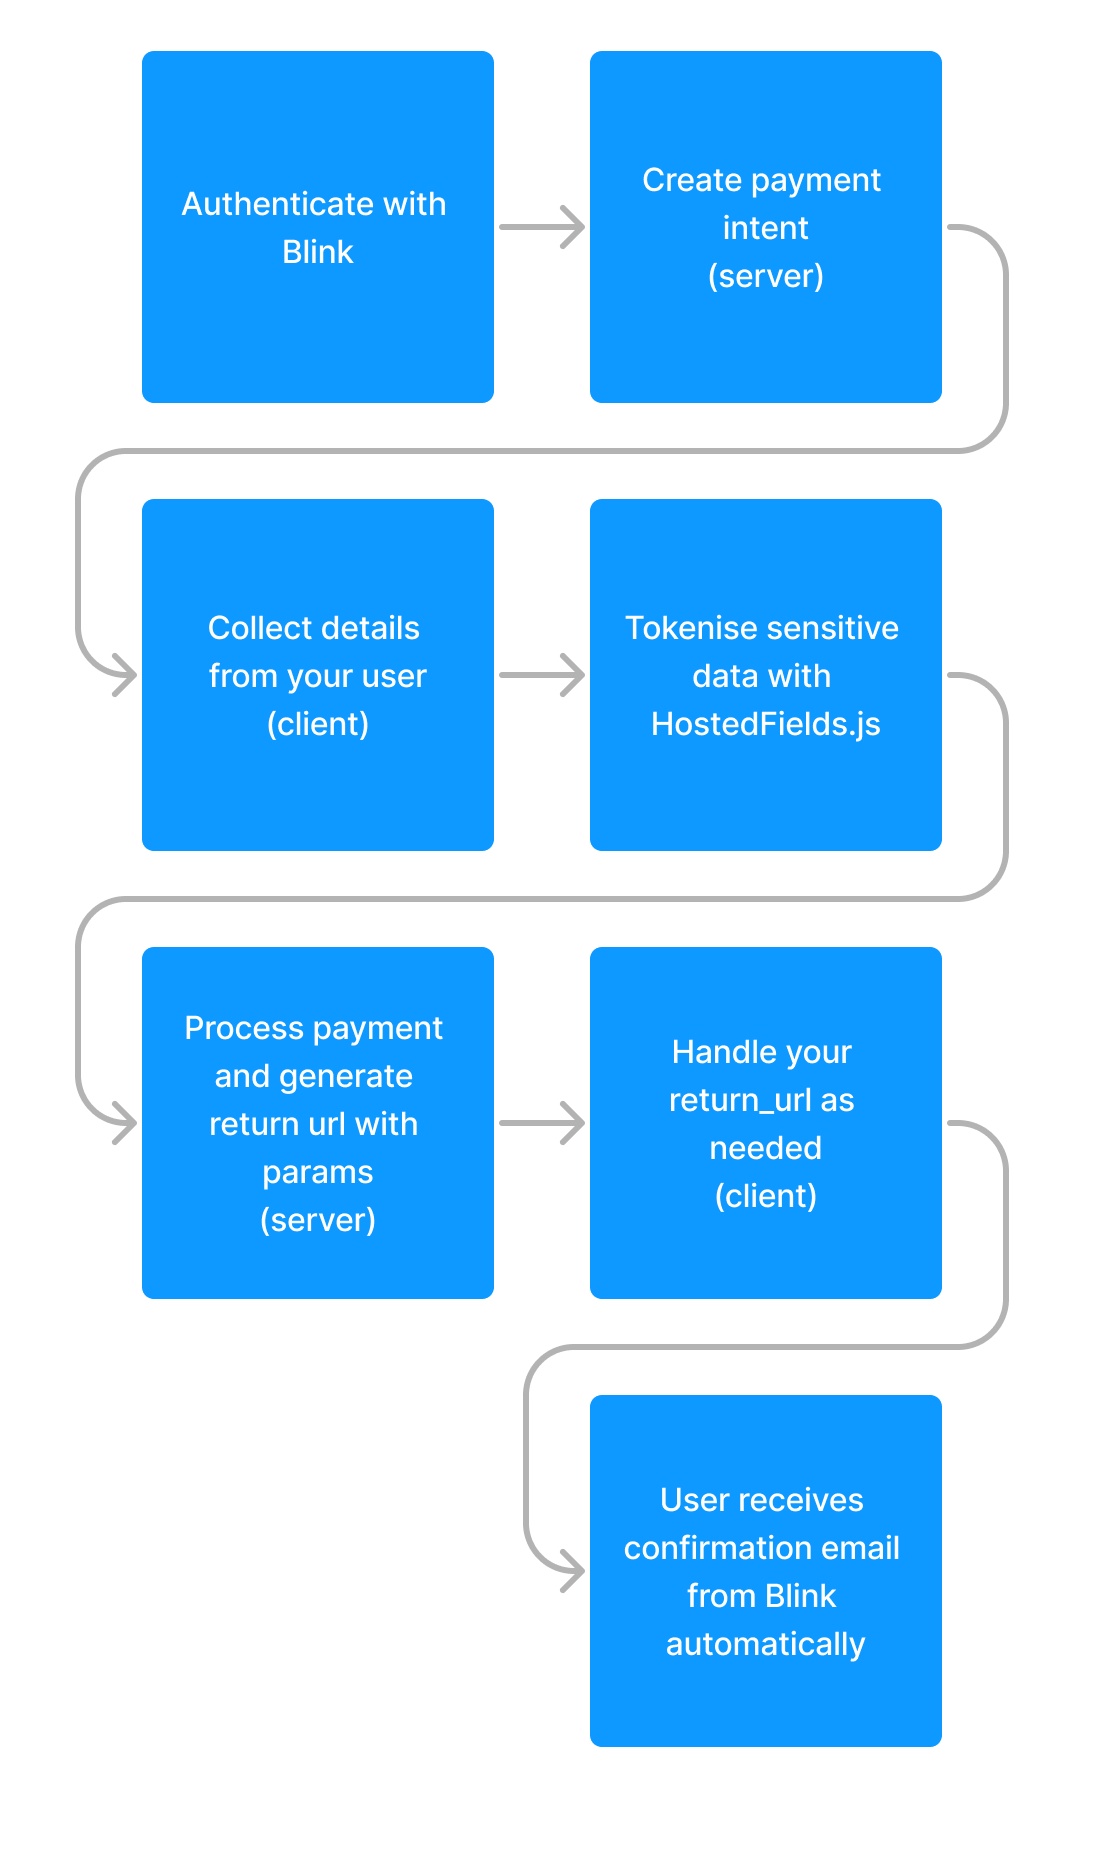
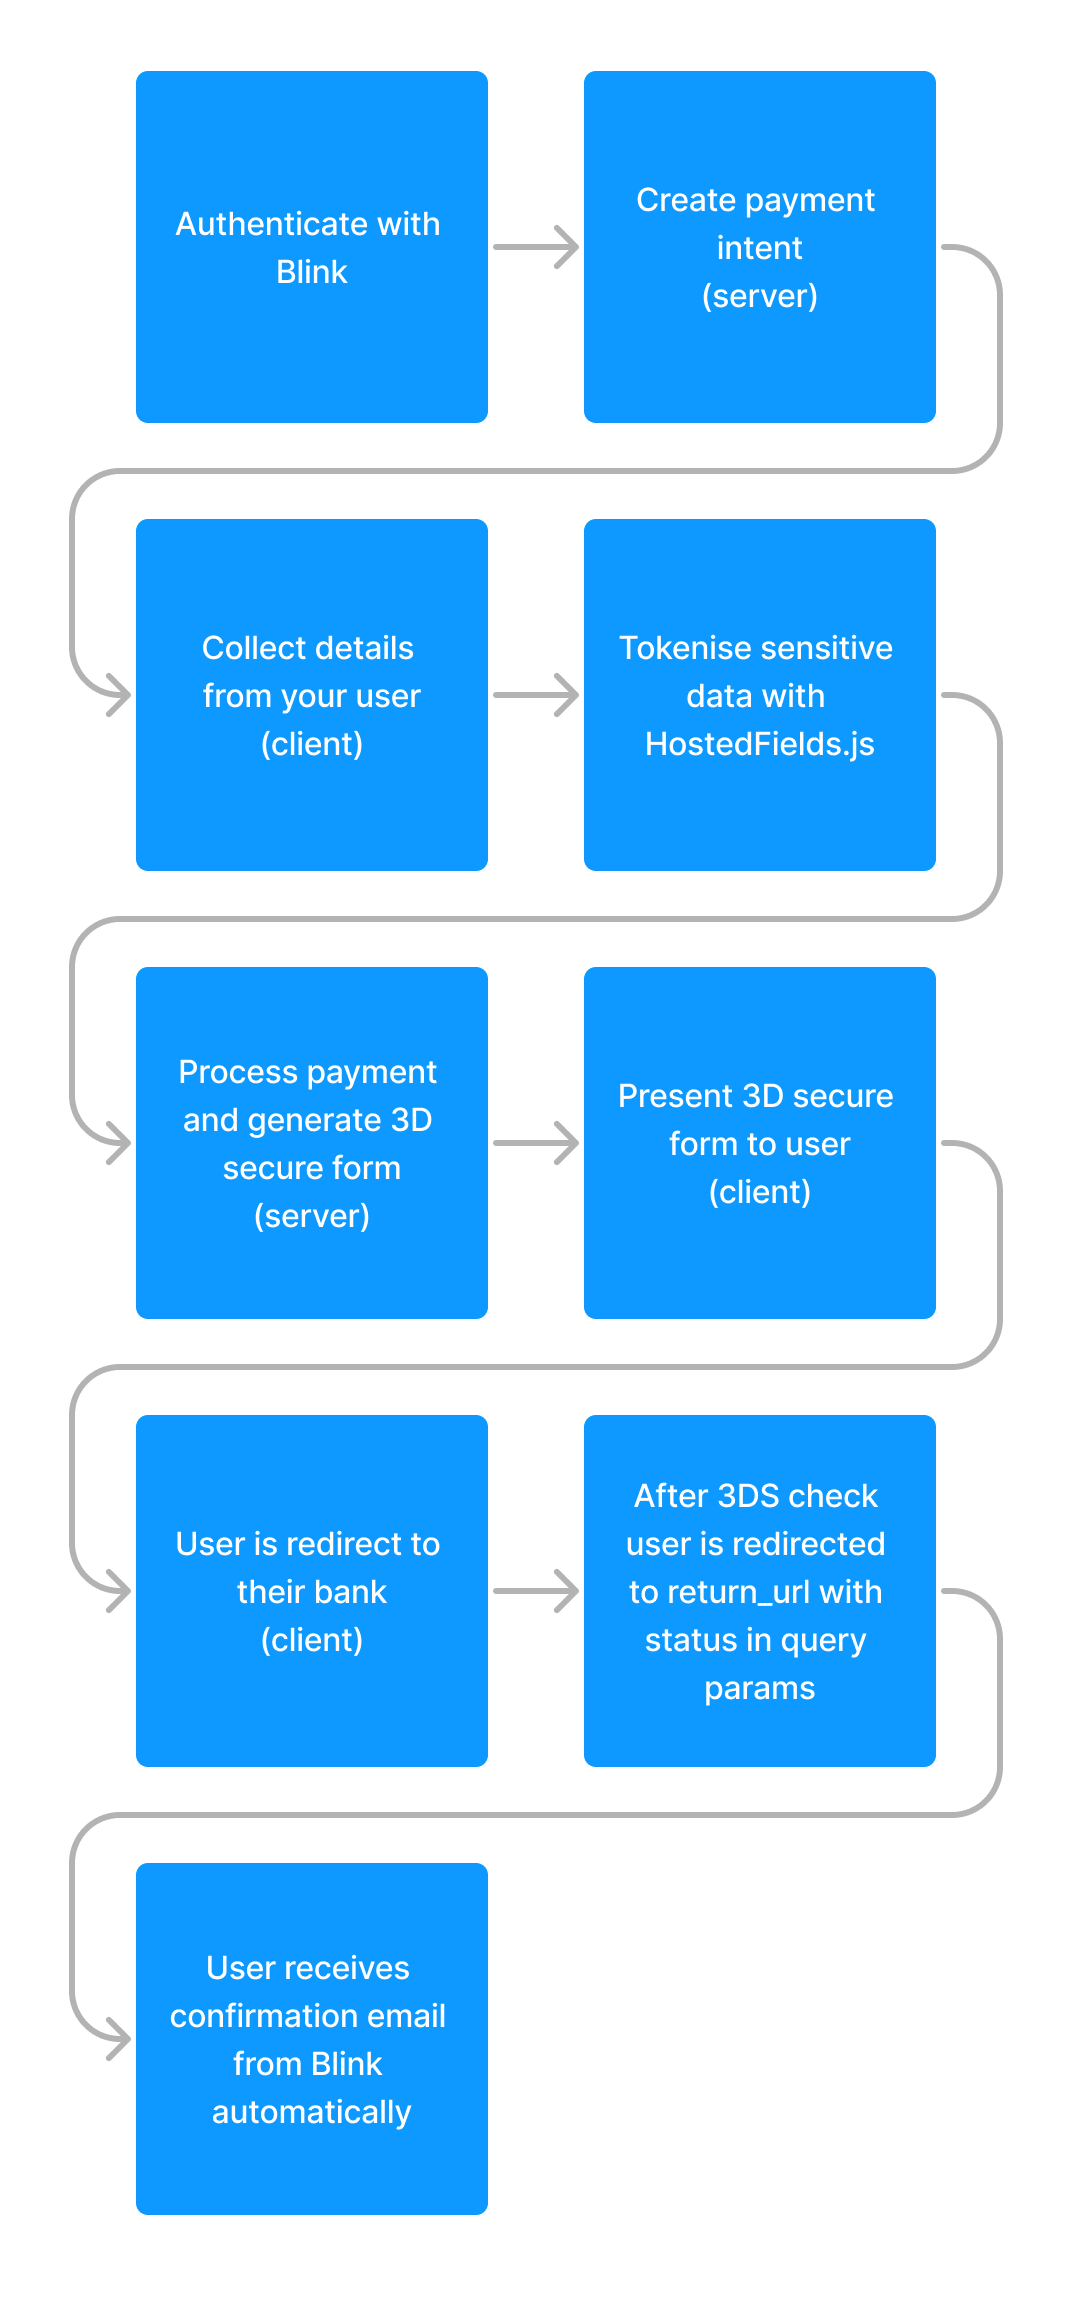
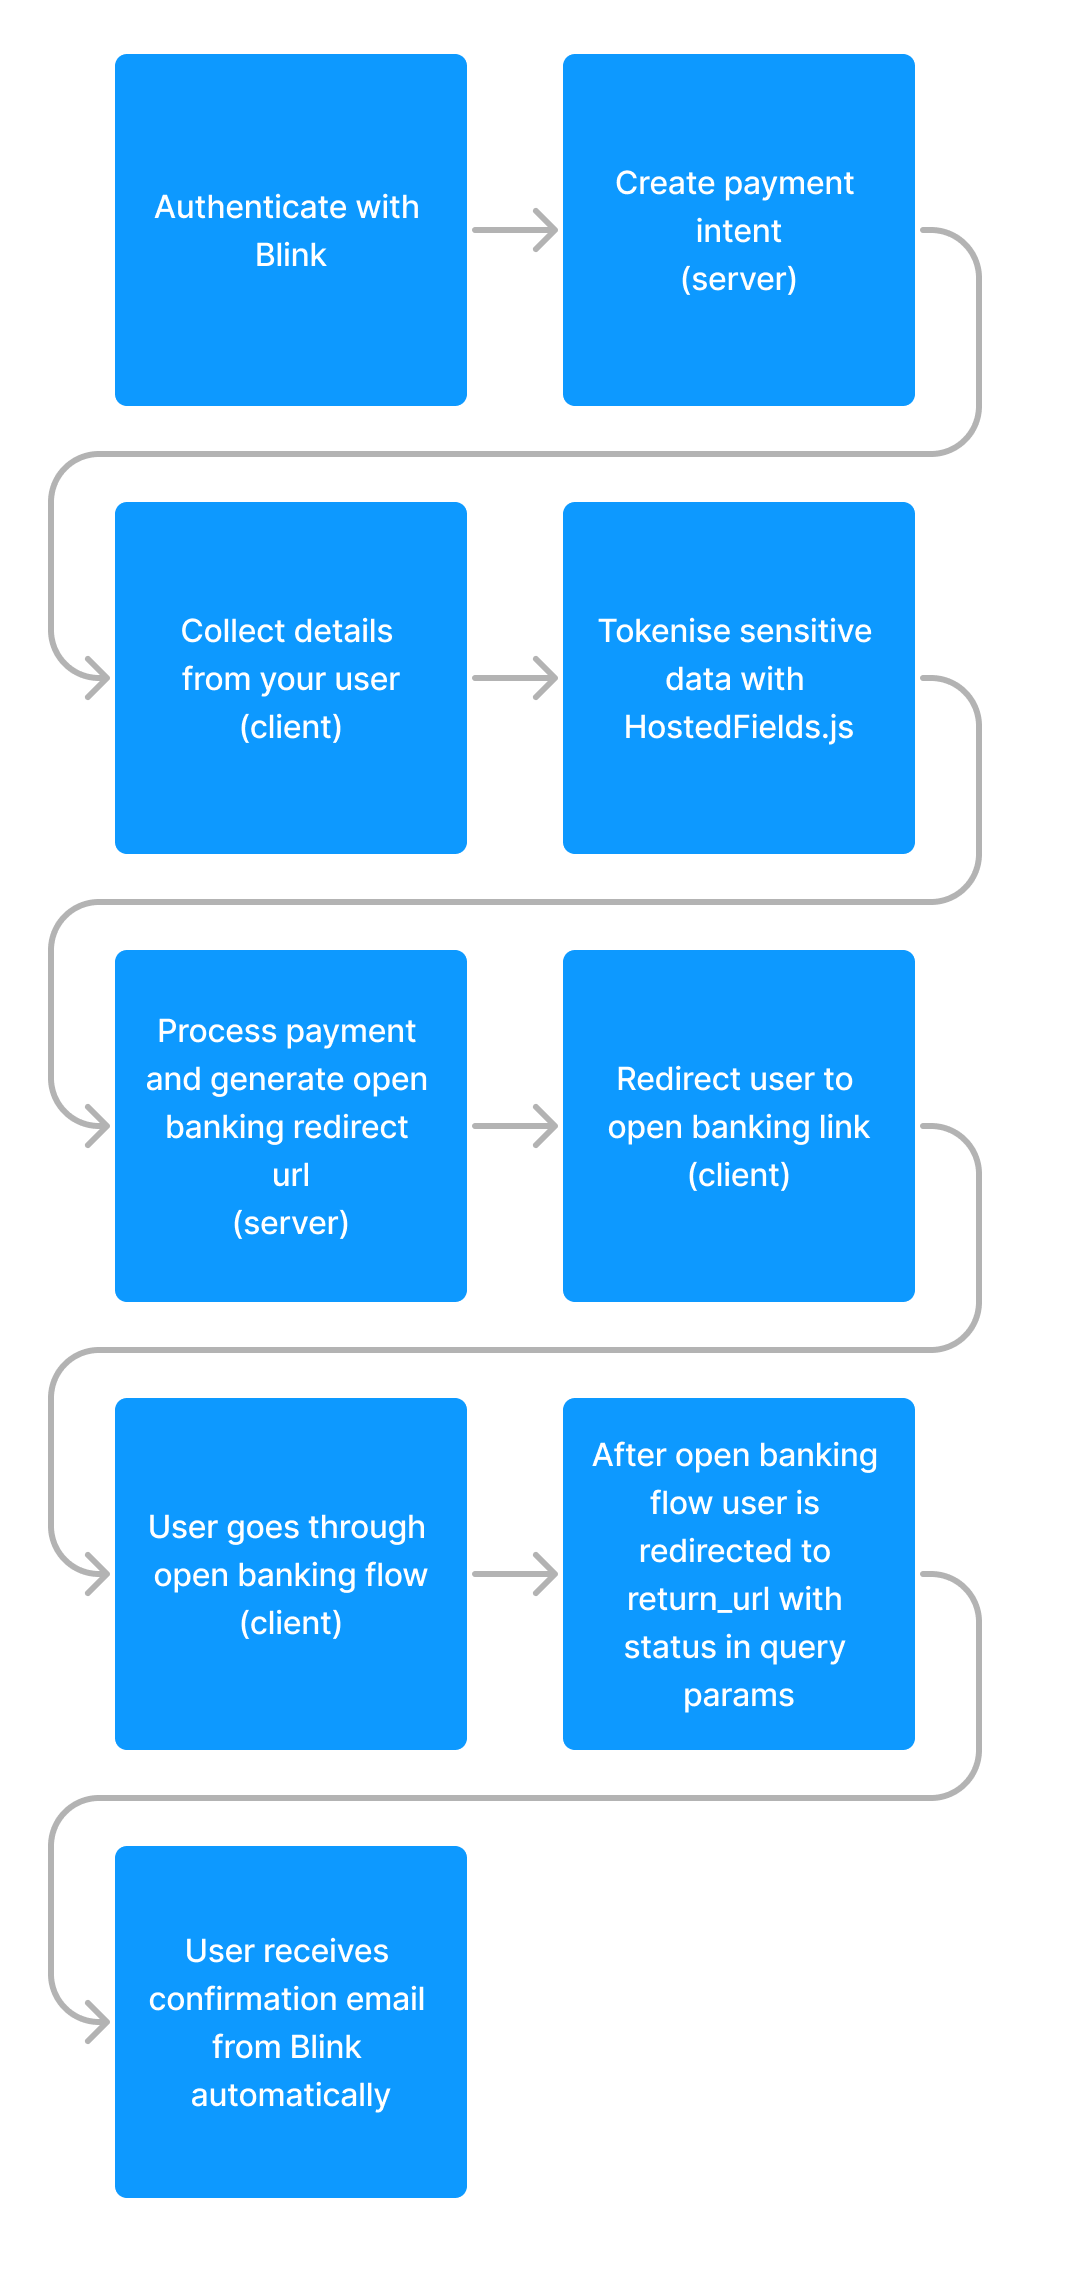
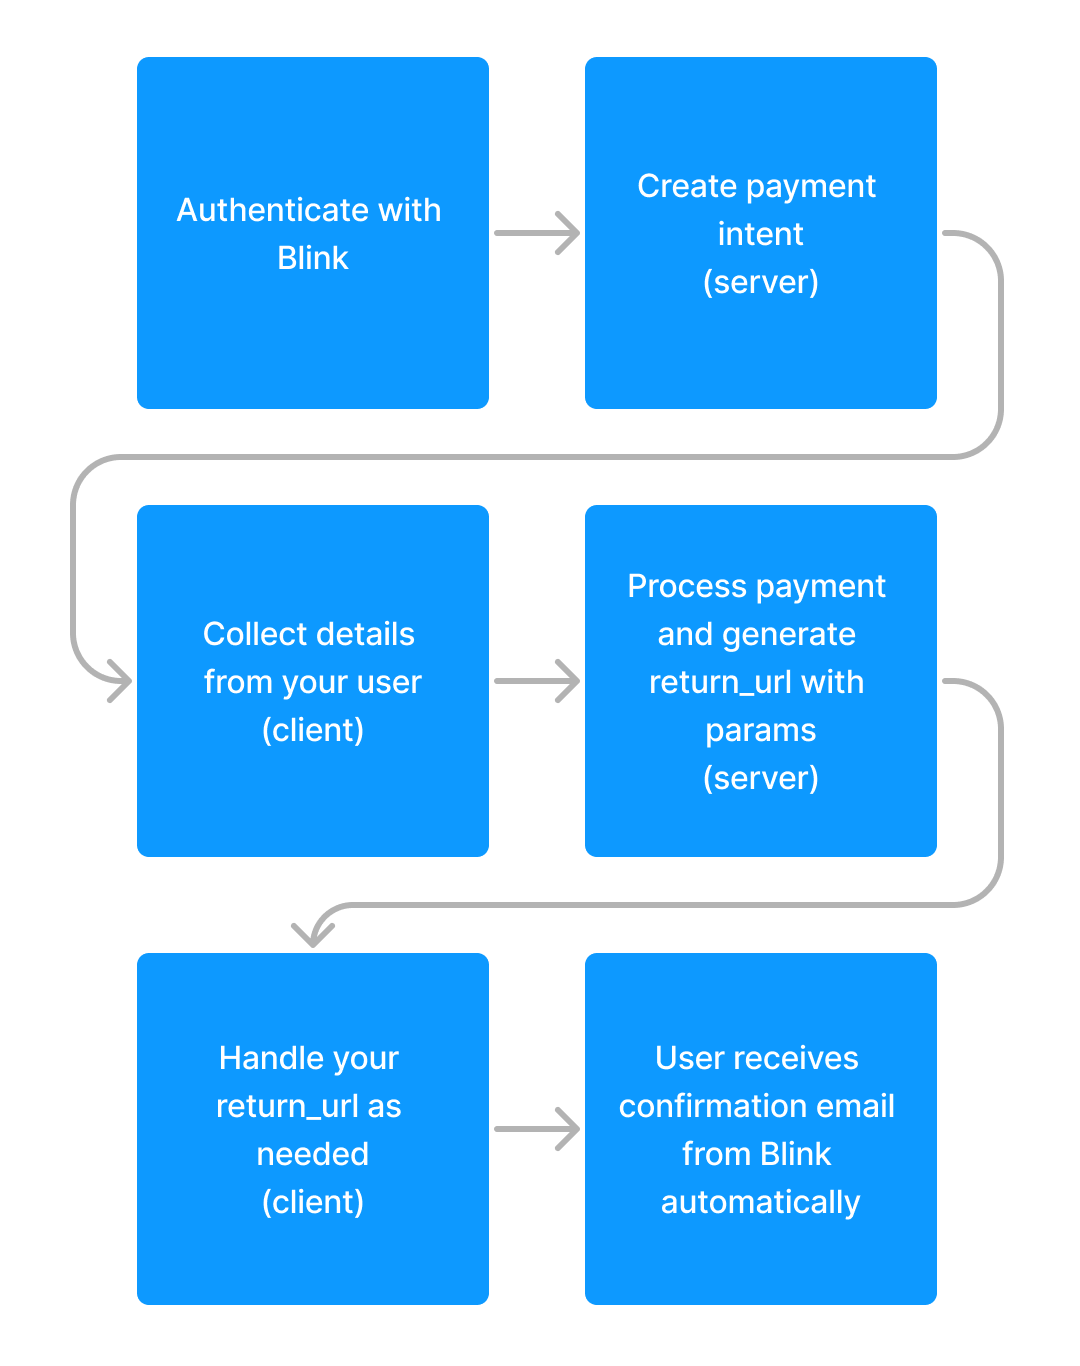
Payment flows diagram
The diagrams below showcase all of the steps involved in processing each type of payment method, as well as whether the action is on your server, the client, or through a redirect url.
- Card (MOTO)
- Card (ECOM)
- Open banking
- Direct Debit
For taking MOTO (Mail Order Telephone Order) card payments via an agent or similar.
For taking ECOM or typical card payments for example in your eCommerce store.
In the following quick start guide we will go through a full example of implementing the Blink API's to take a payment.