Brand your Blink
How to customise your branding in Blink pages

Navigation
Select Customiser within the customer centre section on the left-hand navigation bar. Alternatively, you can select the edit page within my Blink pages.
The page is split into three sections: Blink page, merchant shop, and a preview window.
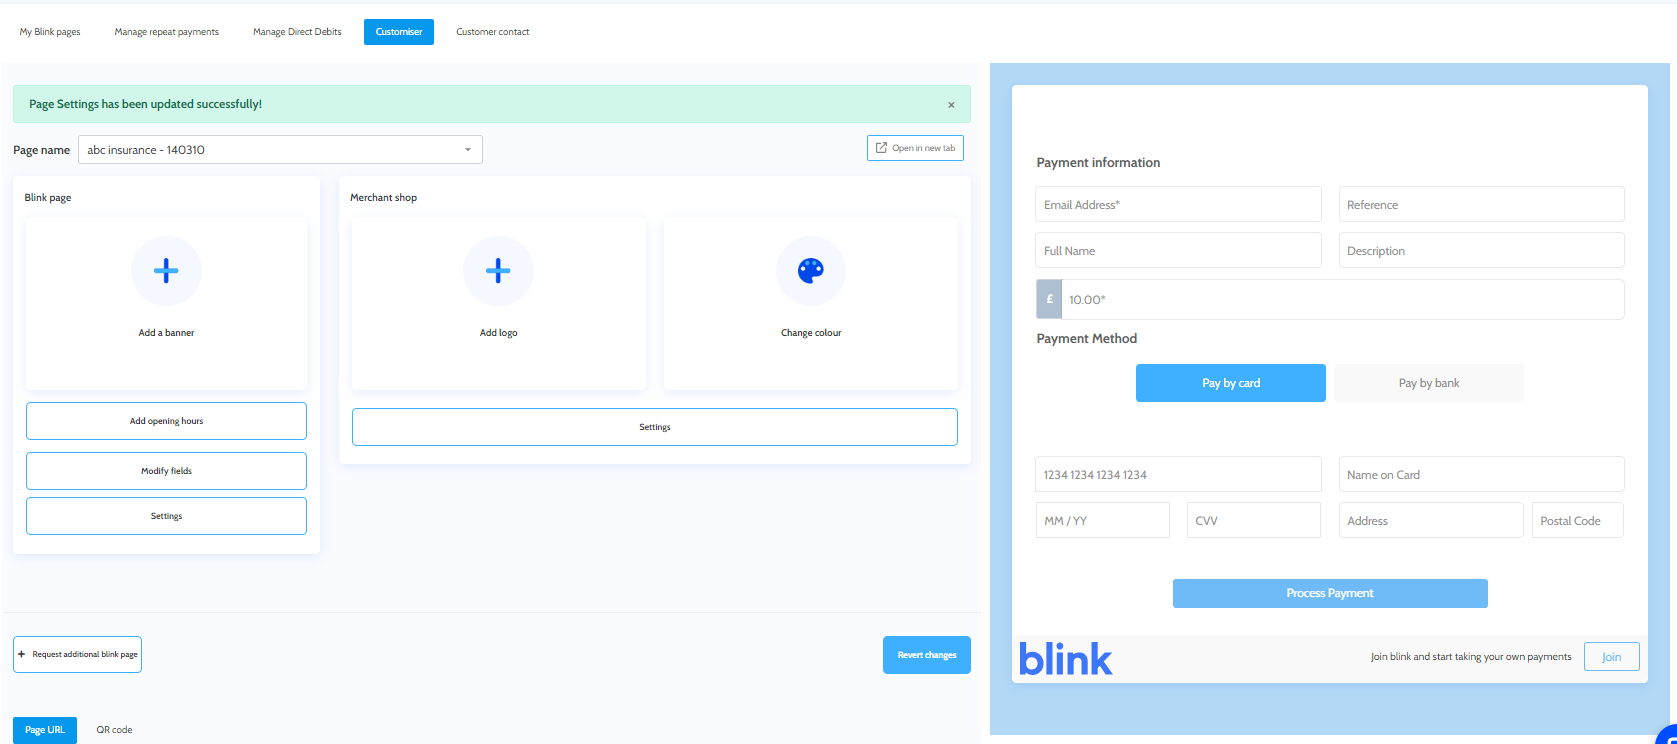
Personalising your Blink page
Choose which MID/page you want to update using the toggles above the Blink page section.
Here are the different sections on your Blink pages that you can customize to make them more personal.
| Functionality | Description |
|---|---|
| Adding a banner | Clicking the add banner icon allows you to upload a banner image (PNG, JPG, JPEG, GIF) to the bottom of your Blink page. (It can be any size, though we recommend keeping it to 610px x 140px. You can change or remove the banner at any time). |
| Adding opening hours | Show customers when you are open and available. Click the icon, toggle on openings hours on the top right, and input the correct time or say you are closed all day. You can also add your contact details here, so customers know how to reach you. |
| Modifying fields | Customise the settings of each field on your Blink page. Make sure you click save changes. |
| Selecting visibility | You can hide the reference or description fields if you don't need them. |
| Selecting required fields | Select which fields are mandatory for the customer to fill in. |
| Marking read-only | If you use URL descriptors, you can mark some fields as read-only (e.g. blink.co.uk/clothingstore?amount=10), so the customer can't change it. |
| Changing display name | Change the name of fields to suit your reporting needs better, and choose the information you want from your customer (e.g. change reference to invoice reference, description to message or full name to company name). |
| Using URL descriptors | Enhanced URLs allow you to prepopulate specific fields on the Blink page using the custom URL descriptor. |
| Changing URL slug | To edit the URL slug of the page, head to settings. |
| Merchant shop | Choose which MID/page you want to update using the toggles above the Blink page section. |
| Updating your logo | Clicking the change logo icon lets you upload your logo image (PNG, JPG, JPEG, GIF) to the selected Blink page. (It can be any size, though we recommend keeping it to 200px x 200px. You can change or remove the banner at any time). If you do not upload a logo, your portal logo will be used by default (see settings); this can cause pixelation issues if the portal logo is too small. |
| Changing background colour | Change the background colour of your Blink page by clicking the icon and choosing a colour or entering the RGB values manually. |
| Settings | These are settings for your Blink page, payment links, and virtual terminal. Select between payment settings and receipt settings. |
Choosing your payment settings
Here are different payment settings you can change on Blink pages.
| Functionality | Description |
|---|---|
| Changing your currency | If you have multiple currency options, select which ones you want to accept on the Blink page. We ask which currencies you would like to use when you set up an account with us. You can request additional currencies to be added by contacting support. |
| Changing card types | Select the card types you would like to accept. You can request additional types (such as Amex) by contacting support. |
| Paylink SMS name | Add a contact name for your customers to see when you send payment links via SMS. |
| Using call-back URL | Send transaction data to your selected URL e.g. https://mytransactions.com/. |
| Order of payment methods | Choose the order you would like your customers to see the available payment methods. The icons on the right show you on which features the new order will display. |
| Adding Gift Aid | Tick this box to add the option of Gift Aid to your Blink page. Click save to implement changes. |
Changing your receipt settings
You can modify several settings on receipts.
| Functionality | Description |
|---|---|
| Receipt phone number | Add your contact number to your receipts. |
| Receipt email address | Add your contact email to your receipts. |
| Receipt sign off | Add a message to your customers at the bottom of the receipt. |
| Receipt redirect URL | Redirect your customers to a webpage after they complete their payment. |
| Receipt redirect timeout (sec.) | Set a time frame from completion to redirection. Click save to implement changes. |
Preview window
The preview window on the right of the page shows how your Blink page will look. It automatically updates so you can see the changes in real-time.
Additional features
At the bottom of the page, you can request additional Blink pages, revert the changes you have made, view or copy the URL of the selected page, and download the QR code for the page.